|
depage-cms v2.7.0
Website editing made easy
|
|
depage-cms v2.7.0
Website editing made easy
|
The Navigation tree in the top left part of the Editing View gives you an overview of the structure of all the pages of your project. depage-cms uses this structure to automatically generate the navigation and file structure of your web presence.

In every tree you'll have access to the following functions to edit the currently active tree:
These are accessible through the toolbar at the top of the window or through a context menu, that opens, when you make a right click on a node.

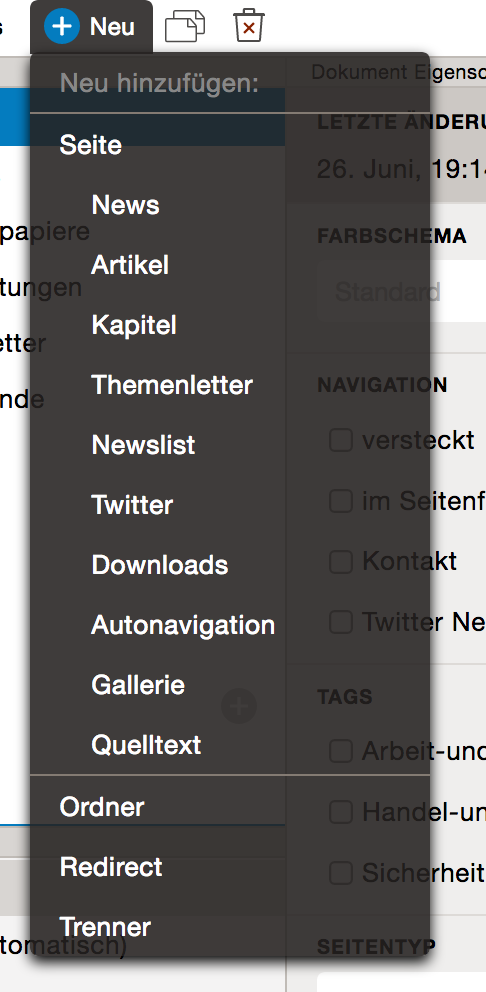
The are three kinds of elements
All three a distinguishable by their icons.
Pages are different from folders because they can contain pages content. Folders don't have content by themselves but are just part of the navigation structure. If you click on a folder in the navigation of your website, you'll go to the first child page inside that folder. Pages and folders can both have child pages and folders. If an element has one or more children, it will be marked with an arrow in front of it.
You can click on the button New to add new pages and folders to your navigation tree. You can choose between oder folder, an ampty page or a page already filled with specific content like text, sections and images.
A new element will be added to the bottom of the child list, and then marked for renaming.
Enter finishes the renaming process, Escape cancels it.
You can also directly add new pages to a specific position in the tree. Just move your mouse on the right part of the tree: Depending on the position of you the mouse, you'll get blue Plus-Buttons, that give you access to add new pages at that specific position:
You can duplicate a page with all its contents by clicking on the Duplicate Button.
![]()
To delete a page, you have to select it first and then click on the Delete button. After confirming the deletion in the opening dialog, the element will be deleted with all its children.
![]()
You can move pages with drag and drop by moving them to a new position in the tree. If you move it on another page, it will be moved to the end of its children. If you move it between other pages, it will be moved directly to that position. A blue marker shows you where it will appear while dragging.
Copying pages works the same way as moving them. The only difference is, that you'll have to press Ctrl until you dropped the element at the new position.
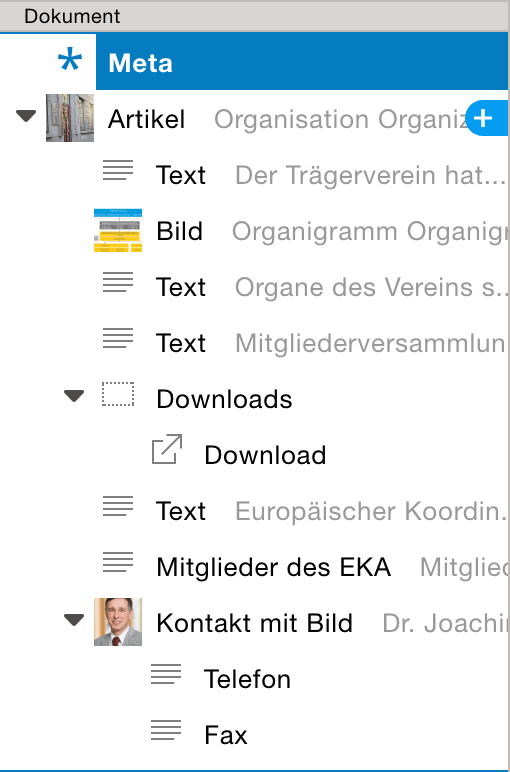
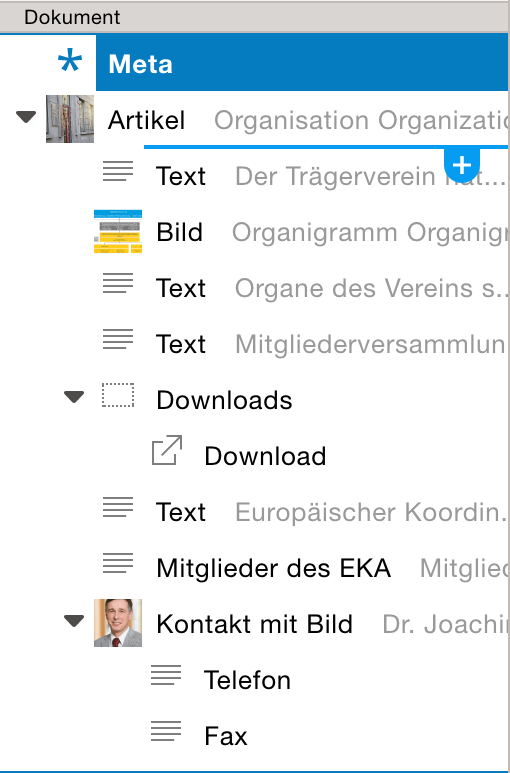
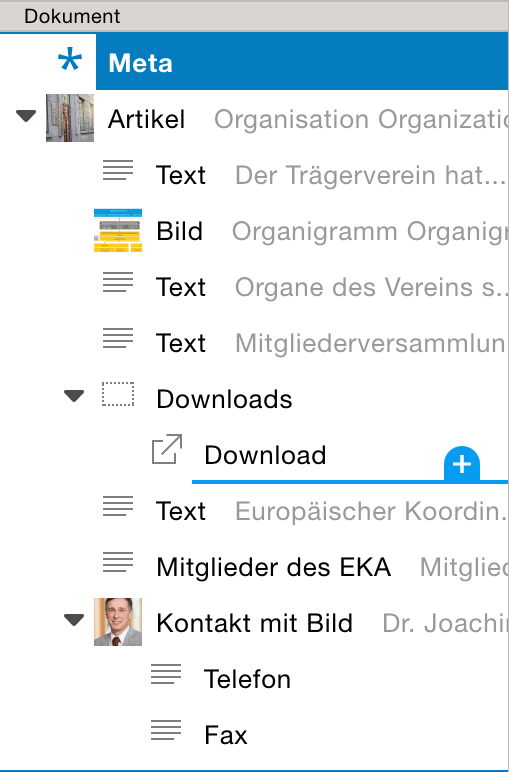
The second tree below the navigation tree is the document tree. The document tree consists of the content of the currently selected page. To edit the document structure, you'll have access to the same tools as when editing the navigation structure: Adding, Duplicating, Moving and Copying and Deleting.
You can add new elements to the tree by clicking on New. Depending on the selected node, you'll only be able to add elements, that can be children of that node - e.g. a new link into a link-list, a new image into a slideshow or a new text into a section.
The document tree also supports the In-Place Menu.
As soon as you select a node, the content of this node, will be displayed in the document properties area.
This are the document property types available:
Text (single line)
Text (single line) is for unstyled single text line, e.g. single headlines etc.
Text (multiple line)
Text (multiple lines) is a multiline text field, e.g. for headlines that span multiple lines and short teasers.
Text (styled)
Text (styled) is a richt text field. It allows styling of the text like bold and italic or to structure your text with bullet or numbered lists, but it also supports linking parts of the text.
Image
The image element lets your choose and embed images in your content. The alt field containes additional text, that gets displayed, when the image cannot be displayed or as long the image has not been loaded yet.
If the width or heigth of the image is enforced, you will only be able to choose the images that match ther parameters.
Depending on the template, you can also add a Link to an image.
More about about the file library
Table
The Table element support editing of simple tables with styling options like the richtext component.
Number
Number is a field, where you can edit numbers with an optional unit, decimal places and min/max values.
Date
Date is a field, where you can choose a date.
Time
Time lets you edit time values.
Link
Link lets you link elements, that are not part of the text content but link whole parts of a template like link-lists or teasers. The can link to internal pages, files in the library or external URLs.
Type
Type lets you choose between options of a document property, e.g. between different text sizes like S, M, L and XL.
Source
The source element is only editable for administrators and developers. It lets you directly add HTML or script elements, that are not part of the given templates. This is useful for special cases, where is does not make sense to add specific templates. But in general: You should minimize the use of source elements.
To style your text, you have to select the text you want to style first. And then you can an option from the styling toolbar.
There are character styles like
And there are paragraph styles like:
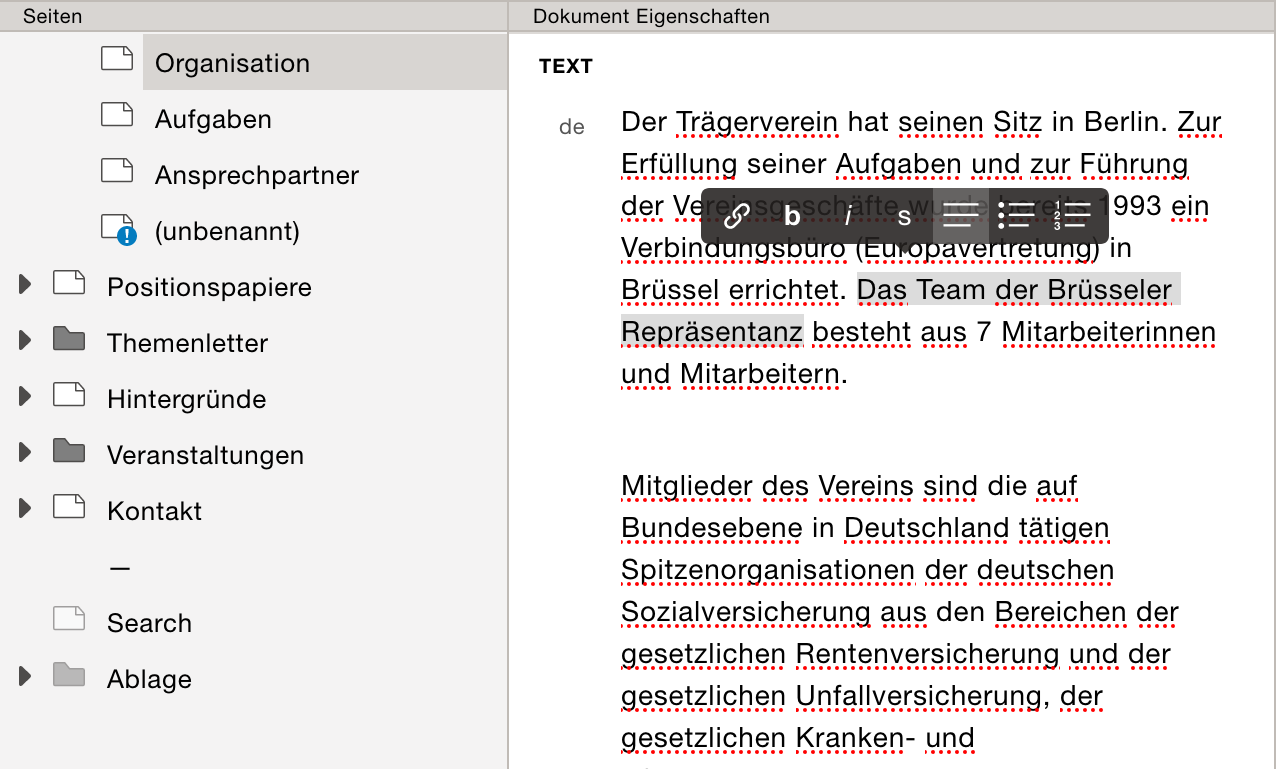
In extended richtext fields, there are also headline styles for h1-h3.
If you paste styled text from other applications, all styles that are not part of the allowed styles, will be removed and normalized, to have a consistent output.
To link a specific section of the text, just select the text, you want to link and then click on the link symbol on the left. The Dialog lets you link to internal pages, to files in the library or to external URLs.
To edit an existing link, just double click on it, to open the dialog to edit the URL.
Internal links look like this:
pageref://[docid]
You can add an internal link, by dragging a page from the page tree into the input in the dialog.
Links to files in the file library look like this:
libref://path/to/the/file.png
And external links are normal links like this:
https://depage.net
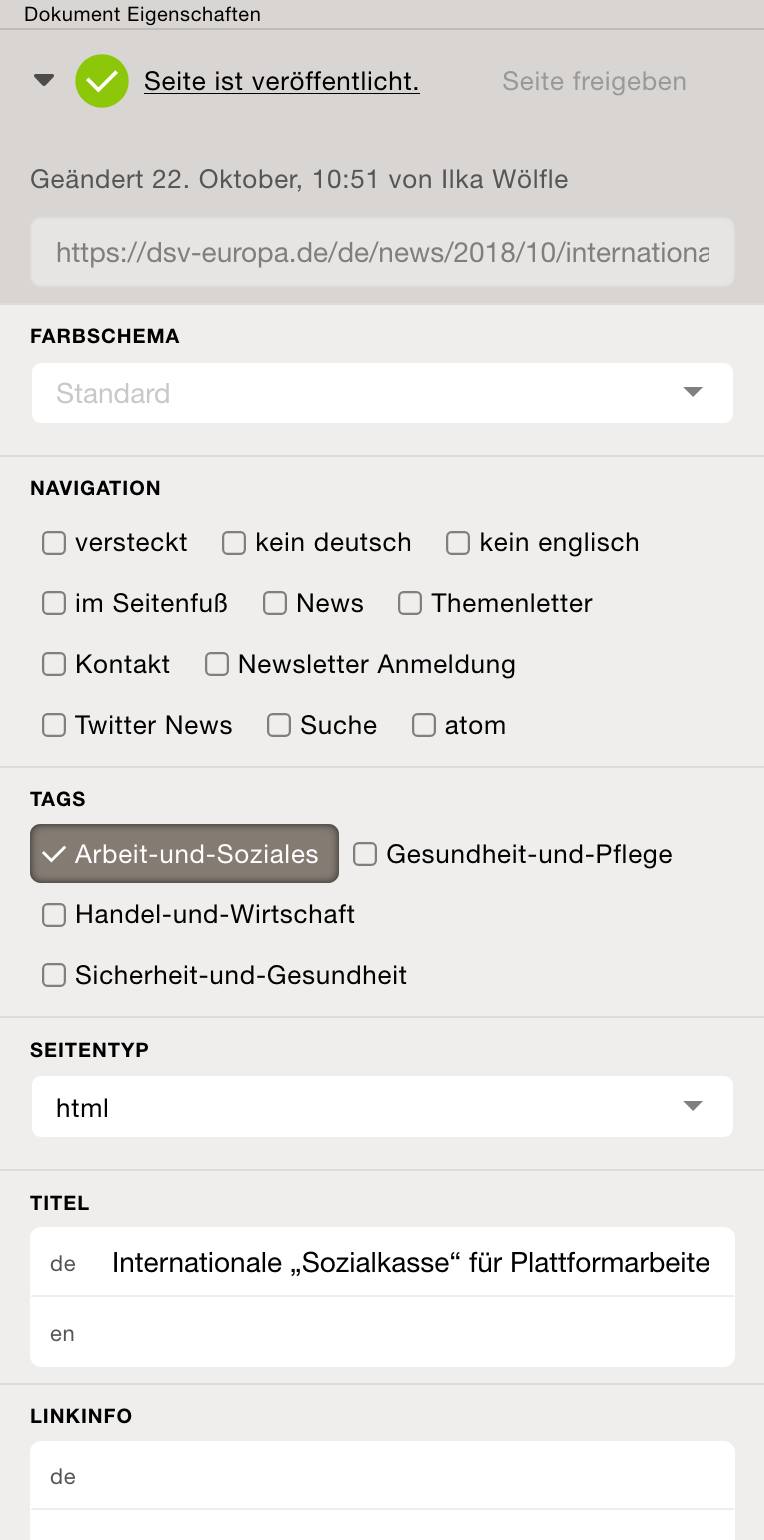
Every page and folder have on common element in depage-cms: The Meta Property. This property is automatically selected, when loading a page.
You can change common page settings in the meta property:
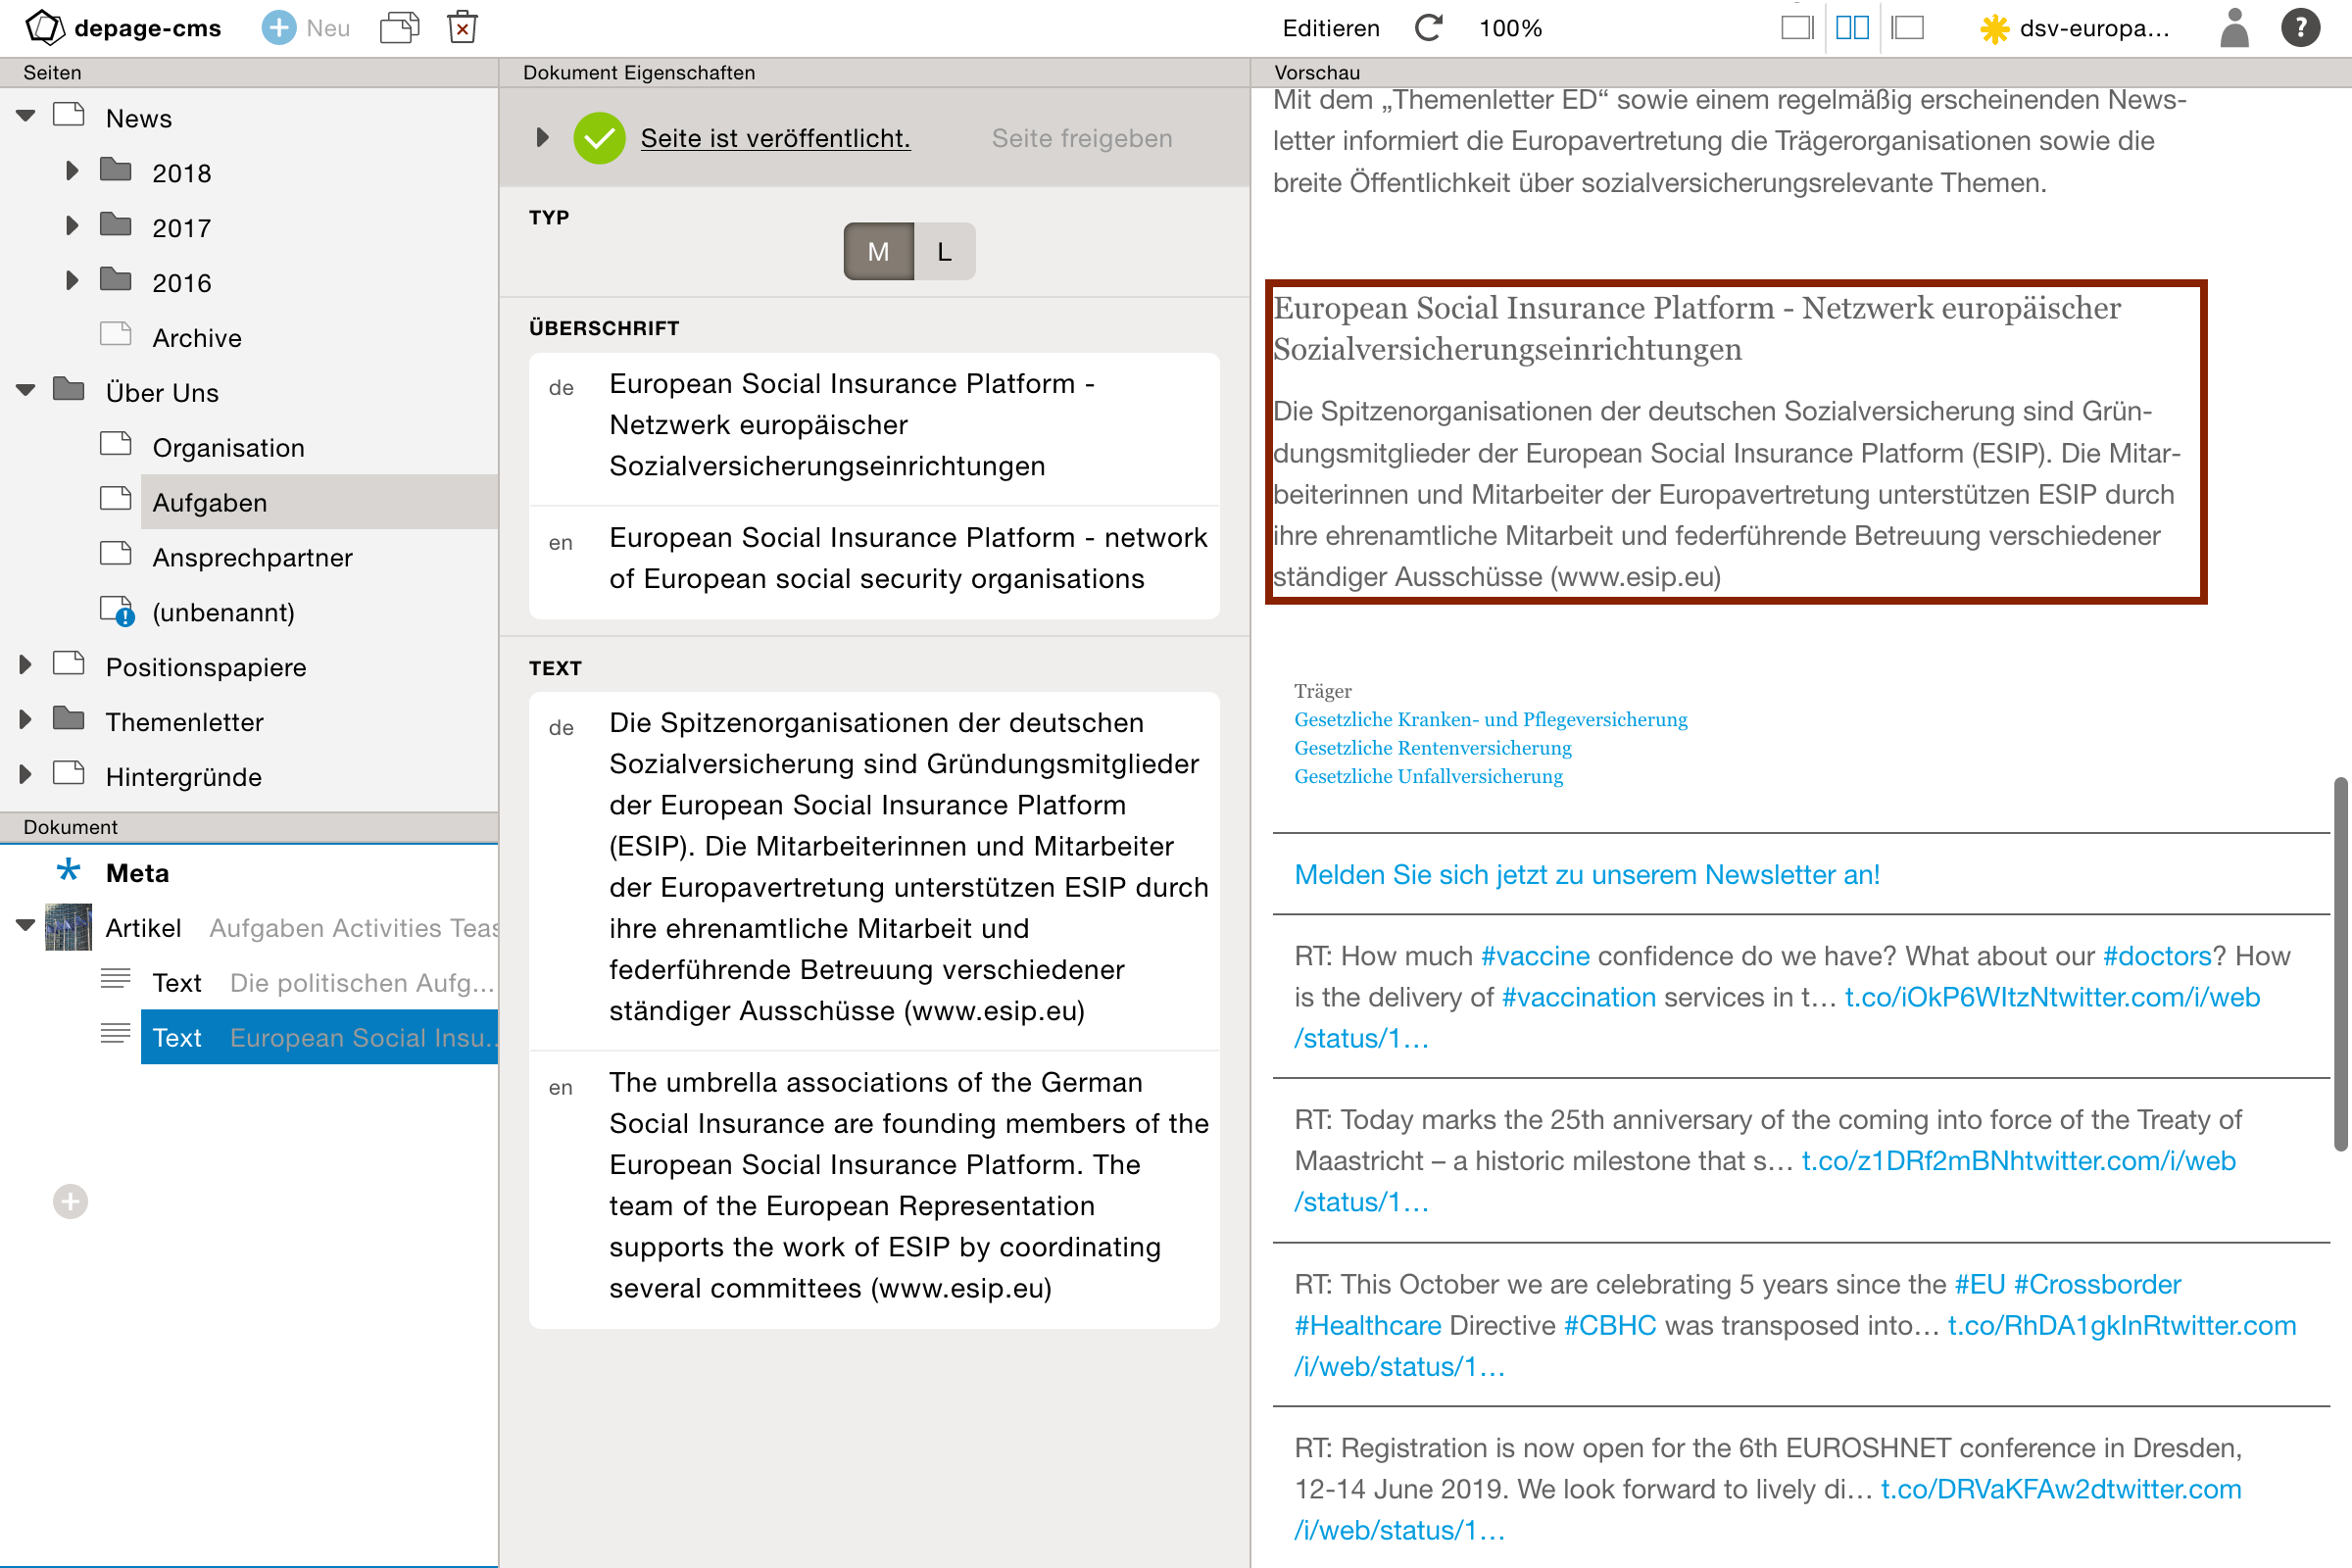
The preview of the current page gets updated automatically when editing your page. The preview will always displayed in the language, you edited last: E.g. if you edit an english text field, you'll get the preview of the english version. But if you edit a german text field, you'll get the german version.
In projects that support highlighting, depage-cms will scroll to and highlight the currently selected elements with a red outline:
If the preview does not get updated for some reason, the user can press the reload button to updated the preview (and the included files like images and stylesheets).
To change the preview to see more on your preview or to show the desktop version on smaller devices, you can change the zoom level to 50%, 75% oder 100%.
By clicking on the project shortcuts on the dashboard, you can quickly add specific, often used page types like news or blog-posts to your page tree. These will automatically added at the correct position in the page tree, but can be moved later if the need arises.
